
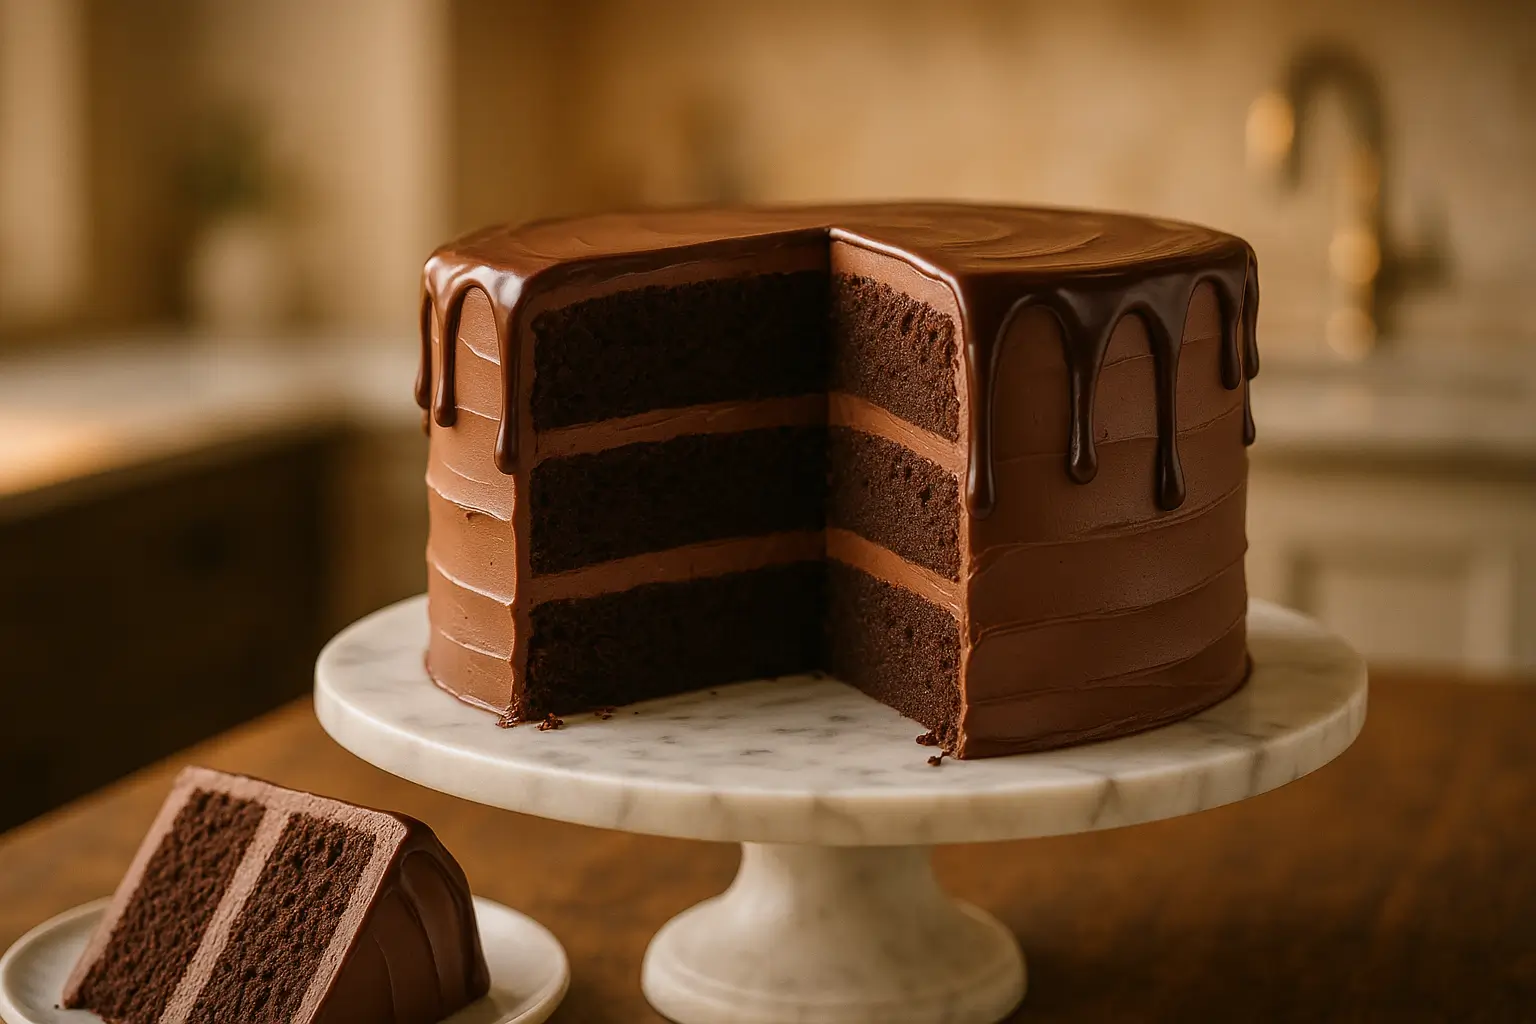
Craving the most decadent, intensely chocolatey experience of your life? This all-inclusive triple chocolate cake recipe offers exceptional richness by perfectly balancing chocolate elements, using reliable methods, and achieving consistent, bakery-quality results every time.
Why This Recipe Stands Above the Rest:
- Three distinct chocolate layers for maximum flavor complexity
- Science-backed techniques ensuring perfect moisture retention
- Professional troubleshooting guide preventing common failures
- Adaptable framework accommodating dietary preferences
What Makes a True Triple Chocolate Cake? Understanding the Chocolate Trinity
A genuine triple chocolate cake integrates three chocolate elements working in perfect harmony:
The Foundation Layer: Rich cocoa powder throughout the cake batter creates deep, earthy chocolate notes while maintaining structural integrity.
The Intensity Amplifier: Melted dark chocolate adds luxurious texture and concentrated flavor depth that transforms ordinary cake into extraordinary indulgence.
The Finishing Touch: Chocolate frosting, ganache, or drip provides the final chocolate crescendo, creating visual appeal and taste completion.
This step-by-step method for making a triple chocolate fudge cake guarantees that every bite offers balanced chocolate flavor, avoiding excessive sweetness or a heavy texture.
The Complete Triple Chocolate Cake Recipe
Ingredients Breakdown: Premium Components for Superior Results
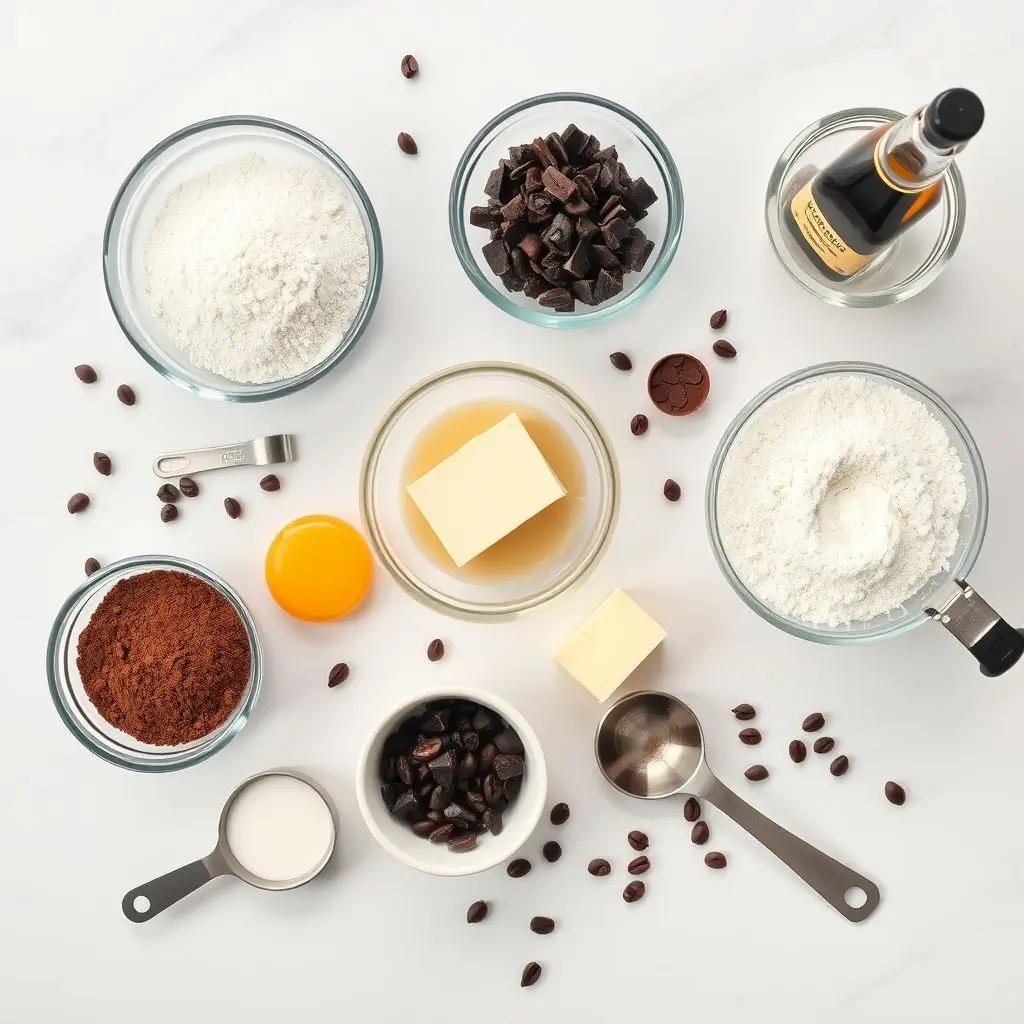
For the Chocolate Cake Base:
- 2 cups (240g) all-purpose flour
- 3/4 cup (75g) unsweetened cocoa powder (Dutch-processed recommended)
- 2 cups (400g) granulated sugar
- 2 teaspoons baking soda
- 1 teaspoon baking powder
- 1 teaspoon salt
- 2 large eggs, room temperature
- 1 cup (240ml) buttermilk
- 1 cup (240ml) hot coffee (enhances chocolate flavor)
- 1/2 cup (120ml) vegetable oil
- 6 oz (170g) dark chocolate (70% cocoa), melted and cooled
For the Chocolate Buttercream Frosting:
- 1 cup (225g) unsalted butter, softened
- 4 cups (480g) powdered sugar
- 3/4 cup (75g) cocoa powder
- 1/2 cup (120ml) heavy cream
- 2 teaspoons vanilla extract
- 1/4 teaspoon salt
For the Chocolate Ganache Drip:
- 6 oz (170g) semi-sweet chocolate, chopped
- 1/2 cup (120ml) heavy cream
- 2 tablespoons corn syrup (for glossy finish)
Step-by-Step Instructions: Professional Techniques for Home Bakers
Preparing Your Workspace:
- Preheat oven to 350°F (175°C). This temperature ensures even baking without burning the chocolate components.
- Grease two 9-inch round pans with butter, then dust with cocoa powder instead of flour for enhanced chocolate flavor.
- Line bottoms with parchment paper for foolproof removal.
Creating the Perfect Cake Batter: 4. Dry Ingredient Foundation: Whisk flour, cocoa powder, sugar, baking soda, baking powder, and salt in a large bowl. This prevents lumps and ensures even distribution.
- Wet Ingredient Harmony: In separate bowl, beat eggs until slightly foamy. Add buttermilk, hot coffee, and oil. The coffee intensifies chocolate without adding coffee flavor.
- The Critical Combination: Pour wet ingredients into dry ingredients. Mix until just combined—overmixing develops gluten, creating tough texture.
- Melted Chocolate Integration: Slowly stream in cooled melted chocolate while mixing on low speed. This technique prevents chocolate from seizing.
Baking to Perfection: 8. Divide batter evenly between prepared pans. Use kitchen scale for precision. 9. Bake 28-32 minutes until toothpick inserted in center comes out with few moist crumbs. 10. Cool in pans 10 minutes, then turn out onto wire racks. Complete cooling prevents frosting from melting.
Mastering the Chocolate Buttercream: 11. Beat softened butter until light and fluffy (3-4 minutes). Proper creaming creates smooth texture. 12. Alternate adding powdered sugar and cocoa powder, beating well after each addition. 13. Add cream, vanilla, and salt. Beat on high speed 2-3 minutes until spreadable consistency achieved.
Creating Professional Ganache: 14. Heat cream in saucepan until just simmering. Pour over chopped chocolate. 15. Let stand 2 minutes, then whisk from center outward until smooth and glossy. 16. Stir in corn syrup for professional shine. Cool until slightly thickened but still pourable.
The Science Behind Chocolate Cake Success: Why Each Step Matters
Understanding Cocoa Chemistry: Dutch-processed cocoa powder neutralizes acidity, creating deeper color and milder flavor. Natural cocoa powder provides more intense chocolate taste but requires careful pH balancing with other ingredients.
The Coffee Connection: Hot coffee doesn’t make your cake taste like coffee—it enhances chocolate’s natural compounds through complementary flavor amplification. The heat also helps bloom cocoa powder for maximum flavor release.
Moisture Mastery: Buttermilk’s acidity tenderizes gluten while adding tangy complexity. Oil provides superior moisture retention compared to butter, ensuring your chocolate cake recipe stays fresh longer.
Temperature Control: Room temperature ingredients combine more easily, creating smoother batters and more consistent results. Cold ingredients can cause chocolate to seize or create dense textures.
Troubleshooting Common Triple Chocolate Cake Challenges
Problem: Dry, Crumbly Texture
Root Causes:
- Overbaking beyond optimal doneness point
- Overmixing batter after flour addition
- Incorrect flour measurement (too much)
Professional Solutions:
- Test doneness with toothpick showing moist crumbs, not completely clean
- Mix batter only until ingredients just combine
- Use kitchen scale for precise measurements
Problem: Dense, Heavy Cake
Root Causes:
- Old or inactive leavening agents
- Overmixed batter developing excess gluten
- Incorrect liquid ratios
Professional Solutions:
- Replace baking soda/powder every 6 months
- Mix with gentle folding motions
- Measure liquids in clear measuring cups at eye level
Problem: Sunken Center
Root Causes:
- Oven temperature fluctuations
- Opening oven door during early baking stages
- Expired leavening agents
Professional Solutions:
- Use oven thermometer for accuracy verification
- Resist opening door until 75% through baking time
- Test leavening freshness before baking
Customization Options: Adapting the Best Chocolate Cake Recipe
Flavor Enhancement Variations
Espresso Intensity Boost: Add 2 tablespoons instant espresso powder to dry ingredients for sophisticated depth without coffee flavor dominance.
Salted Caramel Integration: Layer salted caramel between cake layers and incorporate caramel into buttercream for complex sweetness balance.
Berry Brightness: Fresh raspberries between layers provide acidic contrast highlighting chocolate richness while adding visual appeal.
Dietary Adaptation Strategies
Gluten-Free Transformation: Replace all-purpose flour with gluten-free blend (1:1 ratio) plus 1 teaspoon xanthan gum for structure maintenance.
Dairy-Free Modification: Substitute buttermilk with non-dairy milk plus vinegar. Replace butter with vegan alternative maintaining same fat content.
Reduced Sugar Options: Replace up to half the granulated sugar with sugar alternatives, adjusting liquid ratios to maintain proper texture.
Storage and Make-Ahead Strategies: Professional Tips
Optimal Storage Methods
Short-Term (1-3 days): Store covered at room temperature. Refrigeration can dry out cake texture.
Long-Term (up to 3 months): Wrap unfrosted cake layers individually in plastic wrap, then aluminum foil. Freeze flat.
Frosted Cake Storage: Refrigerate up to 5 days. Bring to room temperature 30 minutes before serving for best flavor.
Make-Ahead Timeline
3 Days Before: Bake cake layers, wrap, and freeze 2 Days Before: Make buttercream frosting, refrigerate 1 Day Before: Assemble cake, apply ganache Day Of: Add final decorative touches
Equipment Recommendations: Tools for Success
Essential Equipment
- Stand Mixer: KitchenAid Artisan for consistent mixing power
- 9-inch Cake Pans: Heavy-gauge aluminum for even heat distribution
- Digital Scale: Accurate measurements ensure consistent results
- Offset Spatula: Professional frosting application and smoothing
Helpful Additions
- Cake Turntable: Easier frosting and decorating
- Bench Scraper: Clean frosting edges and smooth sides
- Instant-Read Thermometer: Ganache temperature monitoring
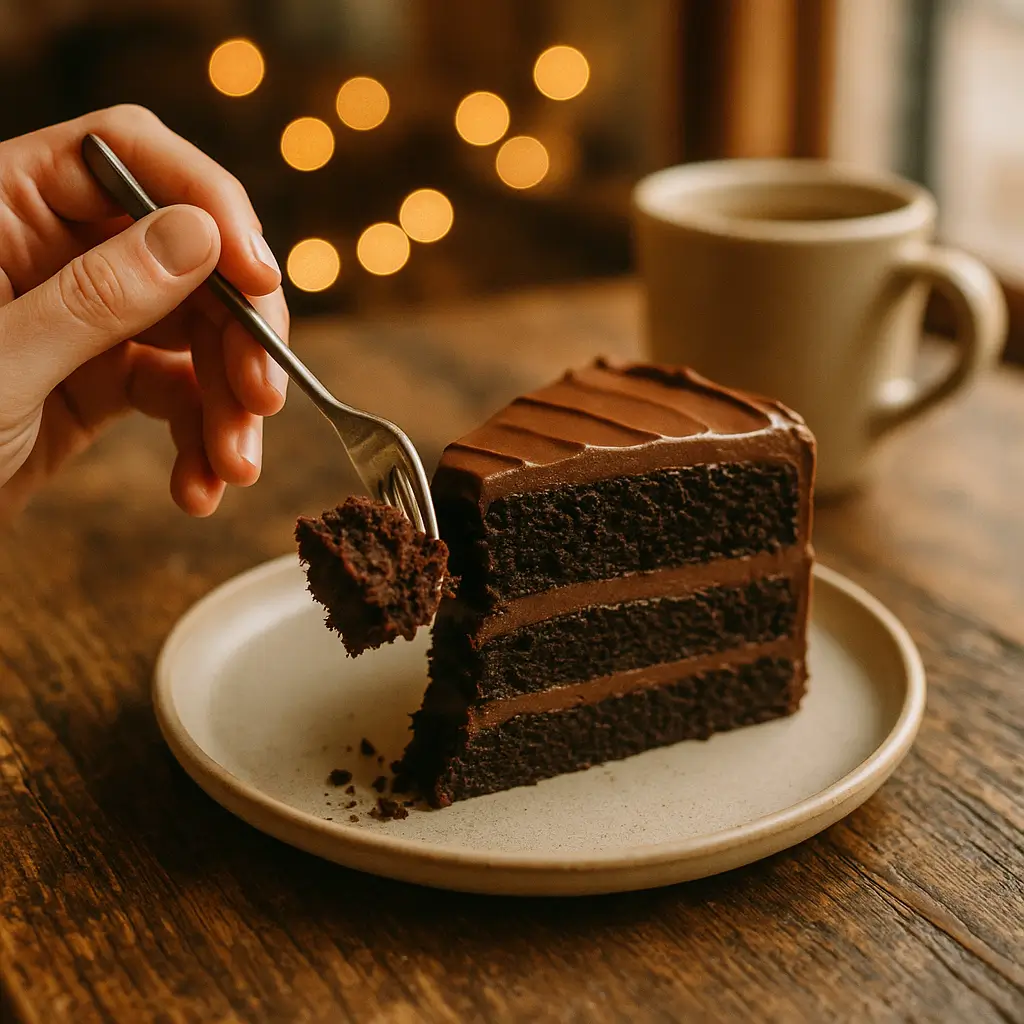
Serving Suggestions and Pairings
This three layer cake pairs beautifully with:
- Fresh Berries: Strawberries or raspberries cut chocolate richness
- Vanilla Ice Cream: Classic temperature and flavor contrast
- Espresso or Coffee: Complementary bitter notes enhance chocolate
- Port Wine: Sophisticated pairing for special occasions
Frequently Asked Questions
Q: Can I make this as cupcakes instead? A: Absolutely! Use standard cupcake liners, fill 2/3 full, and bake 18-22 minutes at same temperature.
Q: How early can I prepare this cake ahead of time? A: Cake layers freeze beautifully for 3 months. Assembled cake stays fresh 3-4 days covered at room temperature.
Q: What’s the best cocoa powder to use? A: Dutch-processed cocoa powder (like Valrhona or Guittard) provides the richest color and smoothest flavor for this recipe.
Q: Can I substitute the coffee? A: Yes, use hot water instead, though you’ll lose some flavor depth. Robust black tea serves as a balanced substitute option.
Q: Why is my ganache too thick/thin? A: Adjust consistency with warm cream (to thin) or refrigeration (to thicken). Ideal ganache coats spoon but drips smoothly.
Final Thoughts: Your Journey to Chocolate Mastery
Creating the perfect triple chocolate cake combines technical precision with creative expression. This comprehensive guide provides the foundation for consistent success, whether you’re a novice baker or experienced professional seeking to refine your technique.
Remember that baking is both science and art—follow the techniques precisely, but don’t be afraid to make this recipe your own through thoughtful customizations and personal touches.
Ready to create your masterpiece? Gather your ingredients, prepare your workspace, and embark on this delicious journey to chocolate perfection. Your taste buds (and lucky recipients) will thank you for the extraordinary effort.
Have you tried this ultimate triple chocolate cake recipe? Share your results, modifications, and questions in the comments below. Your feedback helps us continue improving this comprehensive guide for fellow chocolate enthusiasts!
Related Recipes You’ll Love:
- The ULTIMATE Foolproof Chocolate Ganache Cake
- Baker’s German Chocolate Cake Recipe – 7 Secrets to Moist Cake
- Eggless Chocolate Chip Cookies Recipe: 20-Min Vegan Treat Idea
- Southern Chocolate Cobbler: A Decadent Dessert for Any Season
- The Viral Dubai Chocolate Bar: Make This Luxurious Treat at Home
Have you tried this recipes? Your feedback helps fellow bakers achieve their own chocolate ganache cake success!
Need more recipes, Try our latest chocolate recipes next! And don’t forget to share your favorite creations with us on our Facebook page
Did you try our recipe?
Aucun avis n’a été donné pour le moment. Soyez le premier à en écrire un.